
Monday, December 12, 2016
Wood turning: small canister
Sunday, December 11, 2016
Lathe-turned chain-pulls


Saturday, December 10, 2016
A tool-making tool

Friday, December 9, 2016
Another small bowl

Thursday, December 8, 2016
More from the lathe: my first bowl

Wednesday, December 7, 2016
More lathe turnings

This is kind of an advanced project for a beginner, but I didn't know that when I started it. This took about a half hour to make. The lid fits perfectly, opens with a pop.
Tuesday, December 6, 2016
I got a lathe recently

I haven't used a lathe since high school. That was a long time ago. I'll post the things here that come out of the lathe. Stay tuned.
Friday, November 11, 2016
New sculpture ver. 1.3
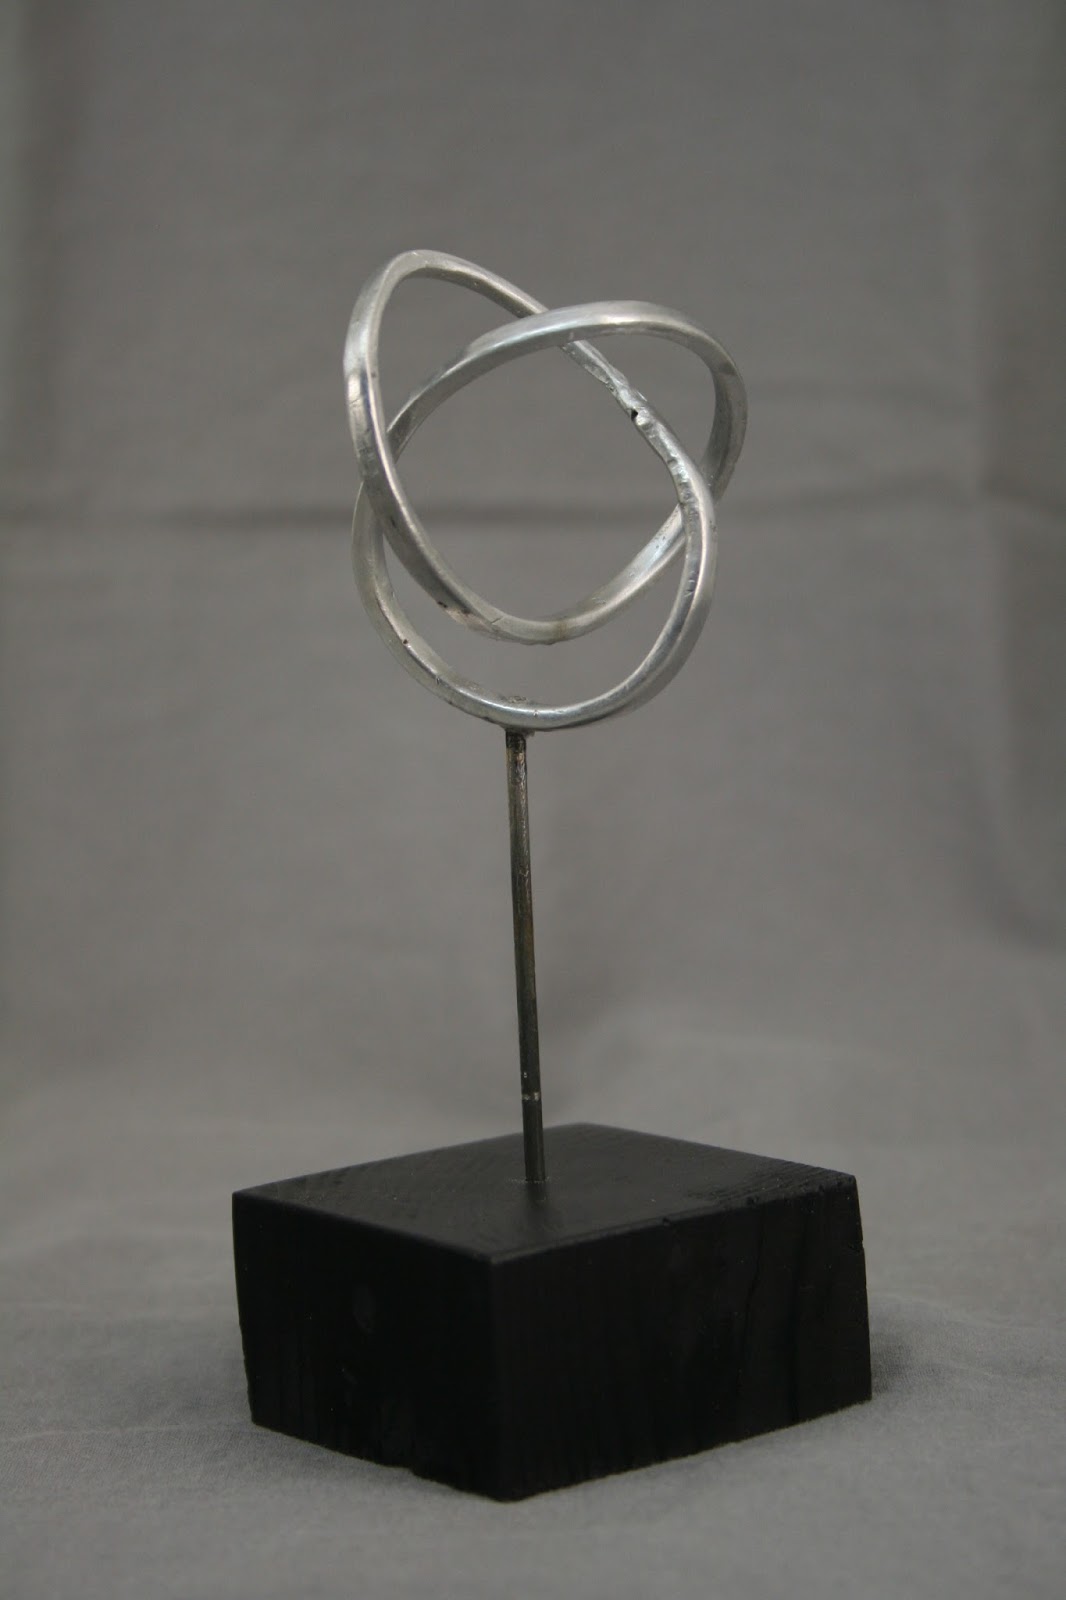
Here's the cool thing about this, and it happened by accident.When I twisted this object into the shape I accidentally twisted one end a quarter turn in relation to the other end when I welded them together. While inspecting the finished build of this model, and I look at things very closely, I noticed something very interesting. What we have is a thick, tapered ribbon of aluminum joined in a loop, so we have a thing with four faces, or sides. If you were to draw a line down the middle of one of the sides of the ribbon, you would go all the way around the loop four times, making a line down the middle of each of the four sides, before you come back to where you began your line! I love it when you accidentally make something better than what you were trying to make! I'm sure there's a fancy scientific name for this kind of a twist/knot shape. If anybody reading this knows, please let me know.
Wednesday, November 9, 2016
A new sculpture


Above,the red model is six inches high, the bronze one is four and a half inches, that includes the bases. I made these models out of cardboard, which is flexible and forgiving, so precision is not required as far as angles and connection joints. An attempt at a wooden version failed completely. Much more precision is required to make everything line up perfectly. I might be able to make this in metal though. That's what I'll try next.
Monday, November 7, 2016
Some small test paintings
Since this is supposed to be an Art blog, I should post some actual art from time to time. Today I'm showing you some small (6" X 6") test paintings done on wood. Here, I was experimenting with making and working on a textured ground. I used sheet rock "mud", or wall patching plaster, as my texturing medium. As experiments will go, some are failures and some are successful.
For the texturing I spread a layer at least an eighth of an inch thick on the face of the wood blank. I could stop right there and let that dry hard or I could use a variety of tools and objects to scrape, scratch, and stamp into the wet plaster.
When the plaster is dry it can be further scratched or carved, or sanded roughly or smoothly. At this point you could even spread on more plaster here and there and working that until you are happy with the textured ground. I mix paint in with a modelling medium and use that to create texture in layers, in different colors, and then sand those down for interesting effects.
For the painting: essentially, any means one would use to apply paint; using brushes or palette knife with very thick paint, adding even more texture. Very thin paints running into all those marks you made in the plaster. Paint can be brushed, troweled, rubbed, splashed, any way you can think of. These paintings are tests, so I'm trying not to repeat myself and I'm trying a wide variety of methods and color schemes. In the process I'm finding I like this small square format. It presents interesting possibilities.
(click on an image to see a larger version)
 |
| Under-painting and Over-painting black. I painted this board and didn't like it, so I painted it black and lightly wiped the paint off before it dried. I did that twice. Then I painted over the black in a few spots, and wiped that off . . . a few times. |
 |
| Gouging and marking while wet. Dried. Then painting and varnish. Then sanding and scratching, revealing fresh plaster. Then more paint applied, and quickly wiped off, the paint soaking into the plaster but wiping of the varnished paint. |
 |
| Deep, dense gouging while mud was wet, then several layers of paint followed by an application of paint mixed with modeling medium applied with a trowel. |
 |
| Thick layer of mud with a few deep lines incised, painted then dried. Then heavily sanded, flattening all the highest parts, exposing fresh plaster. Several more layers of paint brushed and airbrushed on, some simple masking involved. |
 |
| All the texturing here was done in the wet plaster which was dried before painting with no sanding or further altering of the texture. Many light layers of paint, applied with a brush or rubbed on with a rag followed that and resulted in this. |
 |
| This one started with several thin partial layers of plaster. Cans pressed into one layer, straight lines incise another. When dried, paint was poured, rubbed and brushed on. For my taste, this is the best of the bunch. |
Wednesday, September 28, 2016
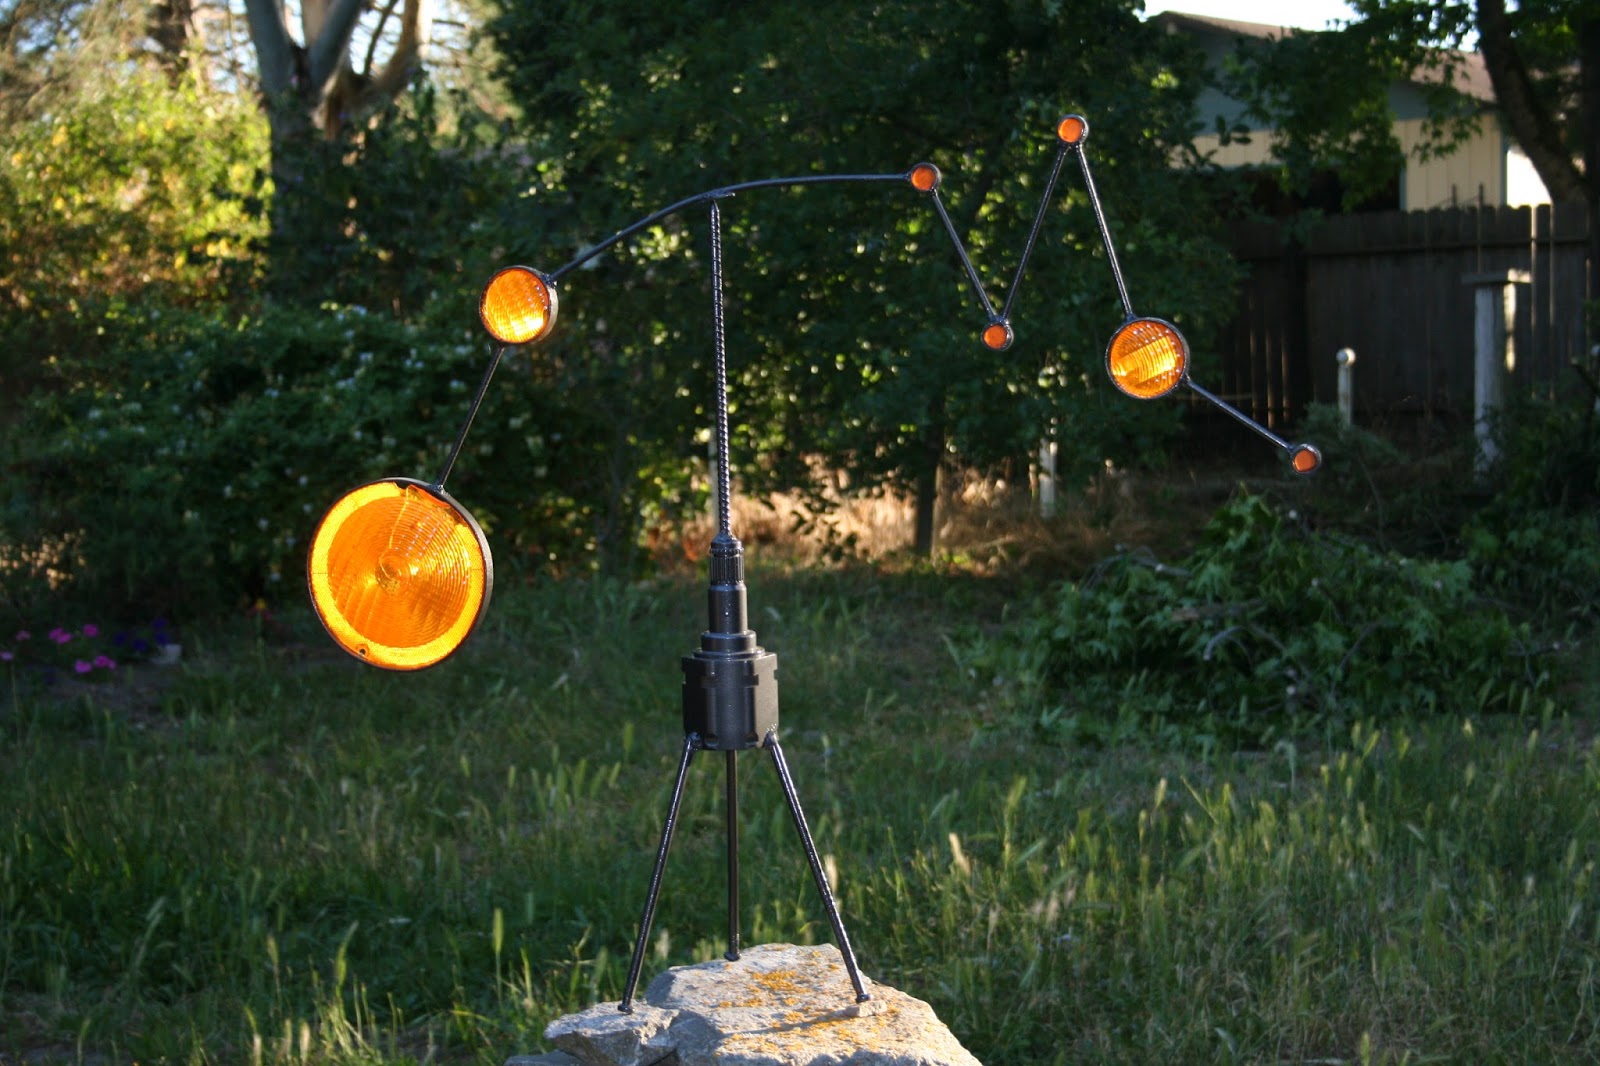
Mobile' #59

I've been making these steel mobile's which incorporate colored plastic or glass in them. I've always liked the idea the these mobile's are "powered" by wind and gravity; natures free energy. And now I'm able to give them "lights", using free sun light to power them. I would point out also that almost all of these mobile's were made from materials I got for free from the trash or literally lying on the side of the road.
Box of the week: Two Oak Boxes

Here are a couple more boxes made from bits of scrap wood in my shop. From time to time I pick out some wood from the scrap bin to make something useful out of it. A lot of the wood I use if from somebody else's scrap bin. I hate to see good wood, even a little bit of it go to waste.
A lot of times my scrap bin projects are tests of ideas I have, or testing a new jig I made. In this case I was trying out a new box joint jig I made. This new jig uses a threaded rod and a crank to move the wood and to make the spacing for the box joint (some call it a finger joint).So, a little bit of nice hardwood and my new jig and no metal hardware results in a couple of nice little boxes. Both are made completely of (White?) Oak. The box above is about 4x6x1.75 inches, with a beveled lid, and stained walnut color. The box below is roughly 5x5x2 inches, with rounded corners and stained "cherry bark". Both are then finished off with woodworkers wax.

Another scrap box challenge: box

Here's another box made from bits of wood from my scrap box. The main body of this 4.5 X 6 inch box is made from a piece of Poplar trim molding. I made a raised base from pine. The lid is made with
Teak (the angled part) the flat top is MDF and the knob is Rosewood. I used a stain to make all the wood the same color. No metal parts are used to make this box.

Friday, September 16, 2016
More boxes


This box is from my "scrap box challenge" project. I decided to see if I could make something interesting from the dregs of my scrap box. Choosing the worst looking bits of wood in the scrap box wasn't quite enough. I picked up some sticks from my backyard as well. The box measures 5 inches square by about 7 inches high. The "knob" on top is a bit of a Eucalyptus branch. The legs are silver maple branch sections, with the bark on. The lid is part of a cedar fence board, left rough, and the sides are spruce construction lumber scraps with 1/4 inch finger joints. The bottom is just a piece of MDF. It's a lift-off lid. Inside box depth is 3 inches. The box is left rough and unfinished. No metal hardware of fasteners were used on this box.
Saturday, September 10, 2016
A new box, with corner splines

Friday, July 8, 2016
Mobile' #58

See this mobile' and the other 57 on my art web site at: Tesserak.net
Thursday, June 23, 2016
Mobile' #57
See this mobile' and the other 56 on my web site: tesserak.net.
Tuesday, June 14, 2016
A Couple More Boxes

What? More boxes? I thought this was an art blog.
Well, yes, it is an art blog . . . and more. Here at Tesserak Studios we make things. All kinds of things. One of a kind things. We craft. We don't manufacture. Yes, I agree, there should be more actual paintings and sculptures seen here. I hope to remedy that soon. The thing about a blog is: if I don't get a photo of the thing I make before it's gone out the door, and I don't have time to write something about it . . . well, then you don't have a blog entry. Also, this is not my only job and this is not my only blog. I only have so much time. In the meantime:
Here are two more boxes I've made recently. Most of the stuff I make is not made from new material. I use recycled, found or scrap materials when ever I can. I don't usually work from plans. I base things on what I have to work with. These boxes are made from small scraps of wood, too small for most purposes. Sometimes I build a box because I need a box. Other times I build a box to practice new woodworking techniques; different kinds of cuts and corners, etc.. These two boxes are practice pieces. Both boxes were made using a jig I made for my table saw for cutting compound angles. In this case, it was used to make boxes with 45 degree angles on the corners but with the sides tilted at an angle. Both boxes are roughly six inches square and about 4 inches high.
The first box has a stepped base, then short sloping sides, and is topped with a stepped lid with a loop handle on top. The sides of the box are made from poplar wood molding, the base and lid are oak and the loop is spruce. The top loop was a slice, with a hole drilled offset and cut at an angle, from a section of a railing. It is interesting that light shines through the tree rings on the thinner part at the top of the loop. The lid is a simple lift-off type. The box is stained and varnished. It's a shallow box, so not very useful. Kind of rustic looking with bit of Asian styling. If I made another like it, it would be a much better box.

The other box is shallow as well but with more interior space. This one came out rather well. The feet, box and knob are made from spruce. The lift-off lid is made from poplar. All the wood is stained so it's all the same color. It's finished with varnish. This combination of angled sides and lid work well together. The angles are repeated in the box feet, making a nice balance of the feet, body, lid and knob. Visually, it has nice lines and good balance. It is a beautifully simple design.
Subscribe to:
Posts (Atom)