Friday, November 11, 2016

New sculpture ver. 1.3

This model is a variation on the idea I posted in my last post. Actually, this version is the original idea I thought of and drew a picture of, but it is the 3rd one I actually made a model of. This was the original idea but I thought I couldn't actually build it, so I made the two that I showed in my last post. When I first got the idea I went out to my shop and quickly bent this thing into shape, then tossed it aside thinking it would be too difficult to make a full size version of it, say 2 or 3 feet in size. I completely forgot about it until I came across it again the other day. It got me thinking about it again, and if I couldn't make a full size one right now, at least I could try to make a model of it. I made this model out of a piece of scrap aluminum left over from another project. This piece of scrap was about 10" long (30 cm), about 3/8" wide (10mm) in the middle and tapered to about an eighth of an inch 
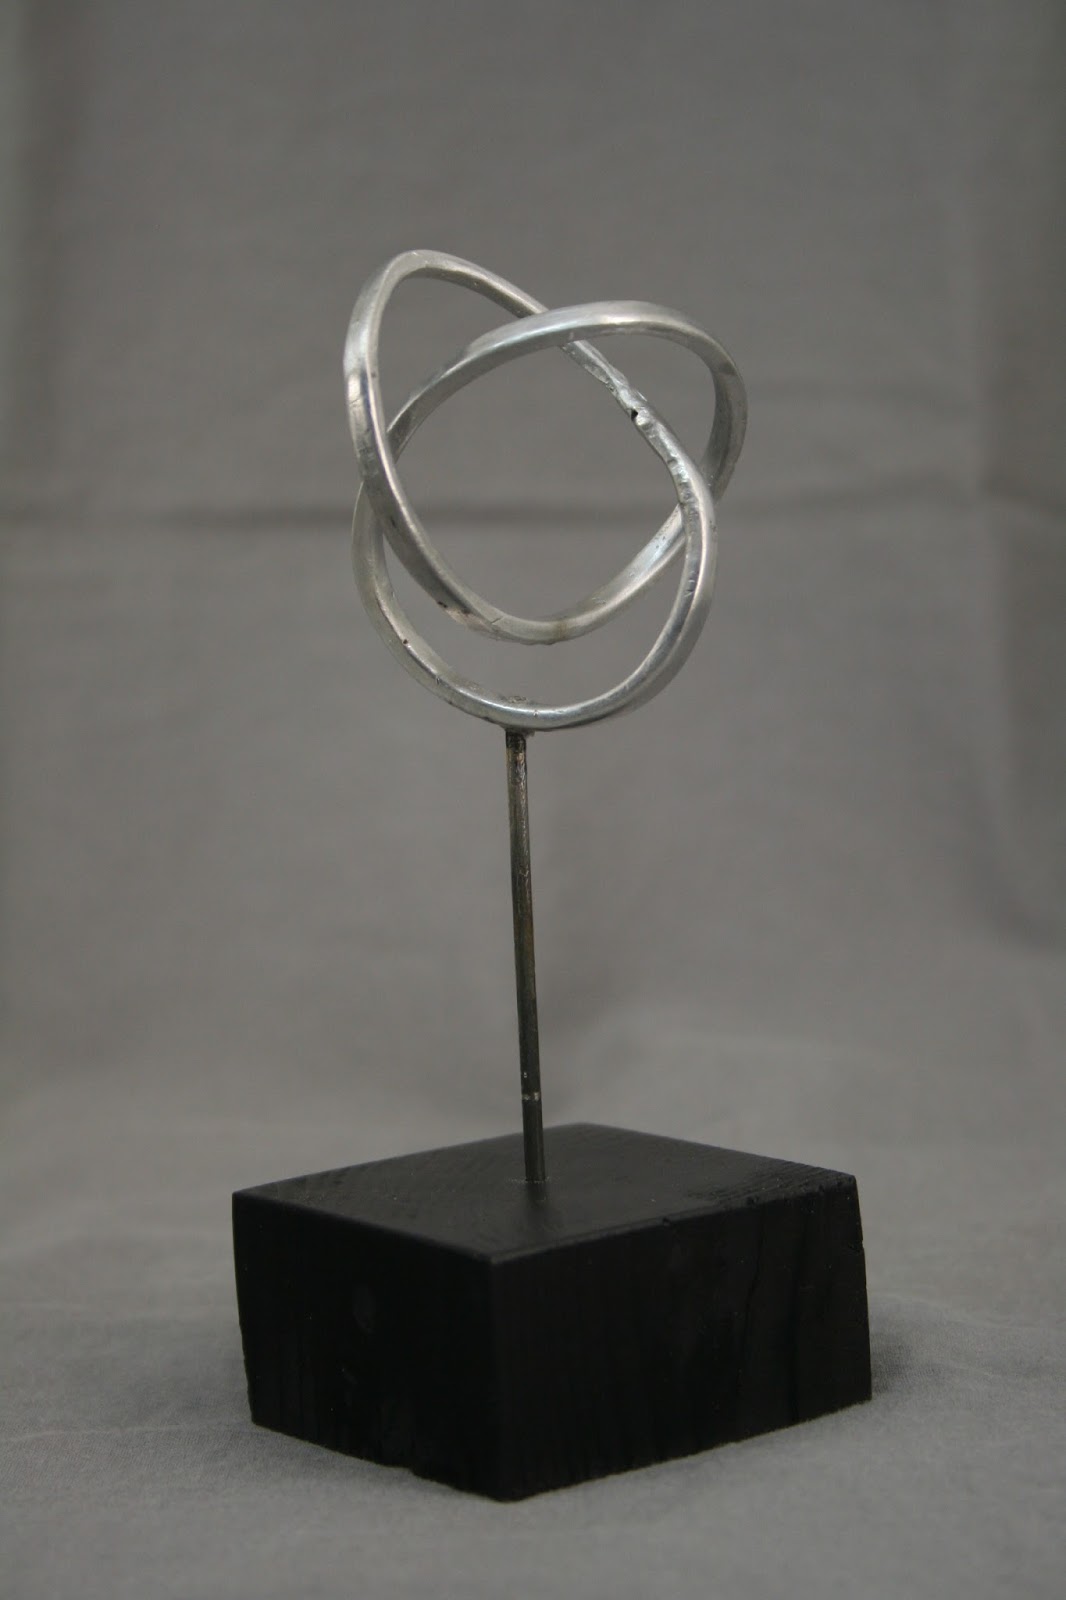
wide (4mm) at the ends. All the bending was done a couple of weeks ago. Now all I had to do was solder the ends together with an aluminum "brazing" rod, do a lot of filing, sanding and polishing which isn't real easy on this 2.25 inch (60mm) object. Then I drilled a hole in it and tapped threads into it, made a post with threads to match and made a base out of wood painted black.
Here's the cool thing about this, and it happened by accident.When I twisted this object into the shape I accidentally twisted one end a quarter turn in relation to the other end when I welded them together. While inspecting the finished build of this model, and I look at things very closely, I noticed something very interesting. What we have is a thick, tapered ribbon of aluminum joined in a loop, so we have a thing with four faces, or sides. If you were to draw a line down the middle of one of the sides of the ribbon, you would go all the way around the loop four times, making a line down the middle of each of the four sides, before you come back to where you began your line! I love it when you accidentally make something better than what you were trying to make! I'm sure there's a fancy scientific name for this kind of a twist/knot shape. If anybody reading this knows, please let me know.

Wednesday, November 9, 2016

A new sculpture

These are a couple of models of a sculpture idea. I was looking at an art catalog and saw a sculpture in stone that sparked the idea for this sculpture. It looked nothing like these models. I drew a picture of the idea I came up with... it looked kind of like a very loose knot . . . which I liked a lot at the time. I liked it but I didn't think I could build it. So I thought about it some more . . . what if it was sharp angles instead of loops? I drew another picture, and the red model above looks just like it.
 I'm thinking these should be made of steel. I envision the final size of the finished outdoor sculpture would be somewhere from four to six feet high. I can also see it as a table top sized sculpture. That is the size I would like to build the next, steel, model. On the larger model, the color would be site-specific.
Above,the red model is six inches high, the bronze one is four and a half inches, that includes the bases. I made these models out of cardboard, which is flexible and forgiving, so precision is not required as far as angles and connection joints. An attempt at a wooden version failed completely. Much more precision is required to make everything line up perfectly. I might be able to make this in metal though. That's what I'll try next.

Monday, November 7, 2016

Some small test paintings

Since this is supposed to be an Art blog, I should post some actual art from time to time. Today I'm showing you some small (6" X 6") test paintings done on wood. Here, I was experimenting with making and working on a textured ground. I used sheet rock "mud", or wall patching plaster, as my texturing medium. As experiments will go, some are failures and some are successful.
For the texturing I spread a layer at least an eighth of an inch thick on the face of the wood blank. I could stop right there and let that dry hard or I could use a variety of tools and objects to scrape, scratch, and stamp into the wet plaster.
When the plaster is dry it can be further scratched or carved, or sanded roughly or smoothly. At this point you could even spread on more plaster here and there and working that until you are happy with the textured ground. I mix paint in with a modelling medium and use that to create texture in layers, in different colors, and then sand those down for interesting effects. 
For the painting: essentially, any means one would use to apply paint; using brushes or palette knife with very thick paint, adding even more texture. Very thin paints running into all those marks you made in the plaster. Paint can be brushed, troweled, rubbed, splashed, any way you can think of. These paintings are tests, so I'm trying not to repeat myself and I'm trying a wide variety of methods and color schemes. In the process I'm finding I like this small square format. It presents interesting possibilities.
(click on an image to see a larger version)

Under-painting and Over-painting black. I painted this board and didn't like it, so I painted it black and lightly wiped the paint off before it dried. I did that twice. Then I painted over the black in a few spots, and wiped that off . . . a few times.

Gouging and marking while wet. Dried. Then painting and varnish. Then sanding and scratching, revealing fresh plaster. Then more paint applied, and quickly wiped off, the paint soaking into the plaster but wiping of the varnished paint.

Deep, dense gouging while mud was wet, then several layers of paint followed by an application of  paint mixed with modeling medium applied with a trowel.

Thick layer of mud with a few deep lines incised, painted then dried. Then heavily sanded, flattening all the highest parts, exposing fresh plaster. Several more layers of paint brushed and airbrushed on, some simple masking involved.

All the texturing  here was done in the wet plaster which was dried before painting with no sanding or further altering of the texture. Many light layers of paint, applied with a brush or rubbed on with a rag followed that and resulted in this.

This one started with several thin partial layers of plaster. Cans pressed into one layer, straight lines incise another. When dried, paint was poured, rubbed and brushed on. For my taste, this is the best of the bunch.